Tuesday 29 August 2017

No line water colouring

Hello Everyone, 

I hope you are having a good day. 

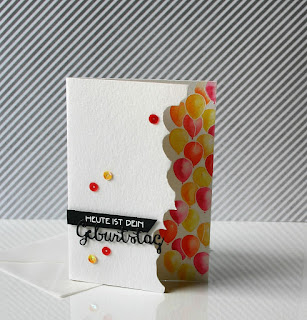
Today I have a watercolour card for you. I practiced my  no line colouring.


I created the panel just for practicing, and I think the right flower looks a bit odd. But I still wanted to use the image on a card. So after I had the panel lying around for weeks, I decided to tear the edges and stick it onto a plain grey card base. I added the beautiful sentiment, which means "for you" and a vellum envelope. 

Very simple, but I like how it turned out. 

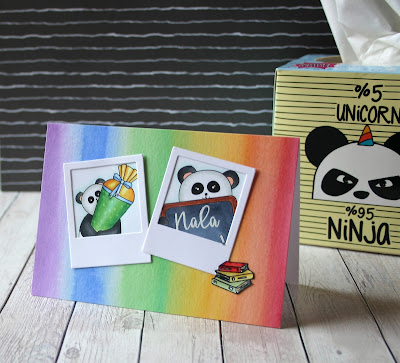
And something entirely different: 
My Pandas actually won the Panda-Challenge, I am sooo happy!


Have a great day!
Ela


Challenges: 
Creative Friday: #186 No-line colouring


Saturday 26 August 2017

School Pandas

Hello again, 

last night I had a night off so I spent some quality time with myself and my craft supplies. I actually managed to create three cards, but I'll only show you this one today.


The Panda images are a freebie for the Task for Two Tuesday Challenge. As one of my daughters is currently nonstop doodling this Panda image (below), I absolutely wanted to try them.


The little lady for whom the card is intended is going to start school only next year, but this way I am at least prepared...

I coloured the Pandas with my alcohol markers and die cut the Polaroid frames for them. Then I stamped, coloured and cut out the books as an embellishment. I heat embossed her name, Nala, on the chalk board, because it practically screams "Write on me". 

I struggled a bit with the background, I really liked the images on white, but I wanted it more cheerful for a child, so I ended up using the water colour rainbow gradient I created ages ago. 

Now, over to you, I strongly encourage you to check out Task for Two Tuesday, I love their cards and challenges and they also have some adorable freebies.

Have a great week-end
Ela


Challenges: 
Task for Two Tuesday: #83 Freebie Panda
Simon says Stamp: Back to School

Friday 25 August 2017

Evolutionary card making

Hello out there, 

how are you? Me, I am glad the week is almost over, it's been a rather trying one, including a broken water-tap, a power outage and the requirement of a new house lead-in. So hopefully, next week will be better.

Today, I have another school themed card for you. Or rather, I have two. 

My friend asked me to help her create some school themed invitations, for her foster son's birthday party. So we mass produced these cards.


We stamped the white card front with an alphabet background stamp in green. For the blackboard frame we used craft card stock and a large wood structure stamp with brown ink. The blackboard itself is black card stock, with quite a bit white pigment ink and white heat embossing. And we cut up a sponge for all the little sponges. The sentiment says "Invitation" in German.

My friend initially wanted to create the card fronts with a rainbow colour scheme, but that was just a bit much for a mass production. But I used the idea, to create a card for the boy himself, as he started school shortly after his Birthday.


I used the same design, except for the colour scheme and the sentiment.

As my friend needed these cards rather at short notice, I fell back on a design
idea I had used several times in the past, but none of the cards look the same. The original idea by Tami was actually a Valentine's card.

See here 's the evolution of a card.


2013
2014
2015
2017

I think it's rather fun to see how one idea can lead to so many different cards over the years...
Which one do you like best?


Love
Ela


Challenges:
Night Shift Stamping: No patterned paper
Simon says Stamp: Back to School

Tuesday 22 August 2017

Sentiments only

Hello Everyone, 

how are you doing? I hope all is well for you. 

Today I'll share two cards I created from leftover paper strips. 

My friend needed more than 100 invitations for a school event, so our kids and us spent a whole afternoon messing with a lot of colour. Unfortunately, we didn't take pictures, so I can't show you these cards, but the result was a whole stack of leftover white card strips, about an inch wide, which gave me the idea for this card.


I stencilled some embossing paste on a black card base and while it dried, I stamped all kinds of Birthday sentiments in black ink onto my paper strips. Then I cut down the strips, coloured them with alcohol markers and arranged them on the dried card base. 

I did the same for this card, only with a rainbow colour scheme, clear embossing paste and a different stencil.


I am amazed, at how many Birthday sentiments stamps I have - considering that I never seem to find the perfect one for the card I am making at the time...

Lots of Love
Ela


Challenges:
Seize the Birthday: Anything goes Birthday
Simon says stamp: Add a sentiment 
Stempelküche: Glückwunsch/Congratulations 
CAS on Sunday: Birthday

Monday 21 August 2017

Honorable mention at Fusion

Hi Crafters,

I am so happy to announce, that one of my cards won an honorable mention at the Fusion challange blog.


I feel so honoured, thank you very much! 
After a rather dreadful week-end, this really does me good. You just made my day so much better!

Hugs
Ela

Saturday 19 August 2017

Challenge up your life: Challenge #73 Summer

Hello Crafters,

two weeks have passed again already, how time flies. Over here were I live, school started again last Monday, so my girls have successfully made it through the first week back at school and work. Good thing it's the week-end now. 


And it is challenge time as well, over at


This time, we are encouraging you to create a summer card!


Challenge #73 Summer


Here's what I made. 
My girls were invited to a pool party during the summer holidays, which is rather unusual, because view people have a pool in their garden here. So I wanted to make a water related card for that occasion, but the only stamp set I could think of, was from lawn fawn and I felt it might not be cool enough for an almost-teenager.

Therefore I wanted to make it special in another way, so he could overlook the cuteness of the critters and I created my first ever pop up box card.

I cut out the box myself, as I don't have a die for it, but that wasn't too hard. I sponged the front and insides with light blues and aquas and a wavy stencil, to create the watery look. I also did that for the inserts, which I cut to a wavy top.


Then I stamped and coloured the critters with alcohol markers, and cut them all out. For some of them I tried mirror stamping, to make them swim in different directions, and one of the fish is hand drawn because that was less effort than mirror stamping, as it was such a simple shape.


I placed them all inside the box, either directly to the inserts or side or with  an acetate strip if they were to go higher up. 

For the sentiment I coloured a piece of paper with my alcohol markers to create the gradient effect and then die cut it with a German sentiment die (means "we congratulate"). I love that die, as it is rather large, very fitting for all kinds of occasions and the dots on the i's are connected to the next letters, so you can't lose them. 

For the personal greeting, I die cut a stitched white panel and glued it to the back. This way we can write something personal, without spoiling the effect on the front. I also embellished that panel with 2 more fish.

So, now it's up to you, have lots of fun creating a summer themed card for us.
Ela


Challenges: 
AAA Cards: Summer fun
Simon says stamp: Add a sentiment
Just add ink: #373 Just add stencils 

Tuesday 15 August 2017

More balloons

Hello Everyone, 

did I mention, that I love my balloon background stamp? 

Today I'd like to show you another card I made with it. Jennifer McGuire show the technique I used on her blog last January, and when I saw the video, I instantly knew I wanted to try that with my balloon stamp.

It is best done with a stamping tool like the MISTI, where you can be sure to stamp in the right place every time.

I created a card base from water colour card. Then I stamped the background stamp on masking tape and chose a line of balloons along which to cut. Jennifer used flower stamps, so she didn't need a mask, but since I was using a background stamp, it needed it to create a natural edge. 


I lined up the mask with the matching area of the stamp and inked up only the area I wanted stamped. (Make sure you clean your stamp well, before you do that). 

Then I stamped the image on the inside of the card and on the card front as well, and heat embossed both images with white embossing powder. 

Next I carefully cut off the embossed balloons on the card front. This way the recipient can see the balloons that are stamped on the inside. 

I coloured them in reds and yellows with my ZIG markers and added a black sentiment strip and die cut and some matching sequins. The sentiment reads "Today is your Birthday" in German.

With the piece I cut off the front, I created a similar card, which never the less looks completely different.


For this one I chose a black card base and coloured the balloons in blues and teals. I adhered the panel with some foam tape and added the same sentiment (different die though). The first part is heat embossed directly to the card base, and the die cut is coloured with the same colours in an ombre effect.

I especially love this version, I think the colouring on the balloons turned out great and I love the colour scheme. I am amazed at how much the black makes the colours pop...

How about you? Which is your favourite?

Lots of love
Ela


Challenges:
Seize the Birthday: Anything goes Birthday
CAS on Sunday: Birthday
Fusion Card: Sketch

Saturday 12 August 2017

Back to school

Hi Crafters, 

how are you all? Ready to send your kids back to school?

For us, school starts again on Monday and I am quite sad the holidays are over already. I am not a morning person and the challenge of all three of us trying  to occupy the bathroom at the same time - before coffee - rather gets on my nerves.

So, for the occasion, I'd like to show you a school shaker card I created, using a German school themed stamp set. It includes a blackboard, a globe and many, many, little school related items, like pens, books, rulers, scissors, a smartphone, even tiny paper clips. 

I wanted to use a whole lot of these in a shaker window, so I stamped and coloured them with alcohol markers. Fuzzy cutting them was a bit of a nuisance, but I did it anyway...

Then I used embossing paste and my much loved brick wall stencil, to get some structure on the white card base. While that dried, I stamped the blackbord on a white panel and created the shaker window. 

I wanted to use the sentiment in the set, which reads "Have lots of fun at school", but I fidgeted quite a bit on the where and how to place it. In the end I setteled on a black strip all across the shaker panel and white heat embossing. I embellished the sentiment with the globe, which I adhered with foam tape. 

Looking back, I probably should have chosen a black panel behind the shaker, to make it look more like a blackboard, but then I would have had to colour the shaker elements much lighter.


So that's it for now, enjoy the rest of the holidays.
Ela


Challenges:
Night Shift Stamping: Anything goes 
Simon says Stamp: For a  Child

Wednesday 9 August 2017

Welcome Paul Maximilian

Hello Crafters,

my niece had a little son a while back (makes me feel so old, my sister is a granny now).
And today I'd finally like to show you the card I created for his birth. 


I didn't want the card to be too cutesy-baby, because it's not really the parents' style. I went for something more classy and timeless. 

I chose some off white card stock for the card base. As I didn't have a large bold star stamp, I used a die by Paper Smooches to create my own fun foam stamp. Then I stamped the stars with antique linen ink. The impressions are not perfect, which makes it look a bit distressed. But that was fine with me, it suited the card.

I adhered alphabet stickers for the name and some tiny wood veneer stars I still had for embellishments. 

It's a  very simple card, but I love how it turned out. That's it from me today, hope you have a great time
Ela


Challenges:

Paper Smooches: Anything goes
Stempelküche: Personalisiert
Simon says Stamp: For a child (I hope this card qualifies, despite the non-childlike style)

Saturday 5 August 2017

Challenge up your life: Challenge #72 Circles

Hello Crafters,

it's time for another challenge at


This week, we are challenging you to use circles on your cards or layouts.


Challenge #72 Circles


I started out, with an entirely different idea. I meant to use an embossing folder with circles, a wide strip of a rainbow gradient I still had lying around and a circle focal point with some kind of image. 
 
I went through my stash and picked a humming bird from WPlus9. I coloured it in blue, green and purple, but then I got stuck... I couldn't make my elements work for me... 

I decided to drop the rainbow and created a whole bunch of circles, I coloured them with alcohol markers in matching colours (blue, lilac, purple, green and grey) and arranged them on a white card base. But it still didn't work, so I dropped the bird as well. 

Now I needed a new focal point. But luckily I  had just received a new sentiment stamp set with the most beautiful scripty sentiments. It's actually an add-on set meant to go inside a circle element, but I didn't get the main set. I just loved the sentiments, and I think they work just as well without a circle.


I stamped the sentiments on a white circle and matted it on a slightly larger grey circle, which was adhered to the card front with foam tape. The sentiments reads "kind regards", but in German that is less formal than in English.

Now, I hope you'll join us in using circles on your projects.

Lots of love
Ela

Wednesday 2 August 2017

Block stamping with water colours

Hey Crafters, 

today I'd like to show you three cards, inspired by Jennifer McGuire

She did a whole buch of amazing cards with block stamping and water colours a while ago. I'll not explain how I created them, if you're interested in the technique, please check out Jennifer's video.

This technique is always fun, so when my daughter wanted to craft with me the other day, we went for it. 


I especially liked Jennifer's cards with the torn edges, so this is how my cards turned out. By the way, I didn't add stitching, because my sewing skills are non existant... Beside I've lost the power cord for my sewing machine. Don't ask me how.


Which one do you prefer?


Lots of love
Ela