Saturday 30 May 2015

Challenge up your life: Challenge #16 Digi stamps

Hello Crafters, 

Today, we are challenging you again, over at 


Lets all use digi stamps these two weeks!

Challenge #16 Digi stamps


You can use any digi stamps you like, but we are showcasing Jessa's lovely designs. Please check them out here, they are so much fun and they are free.


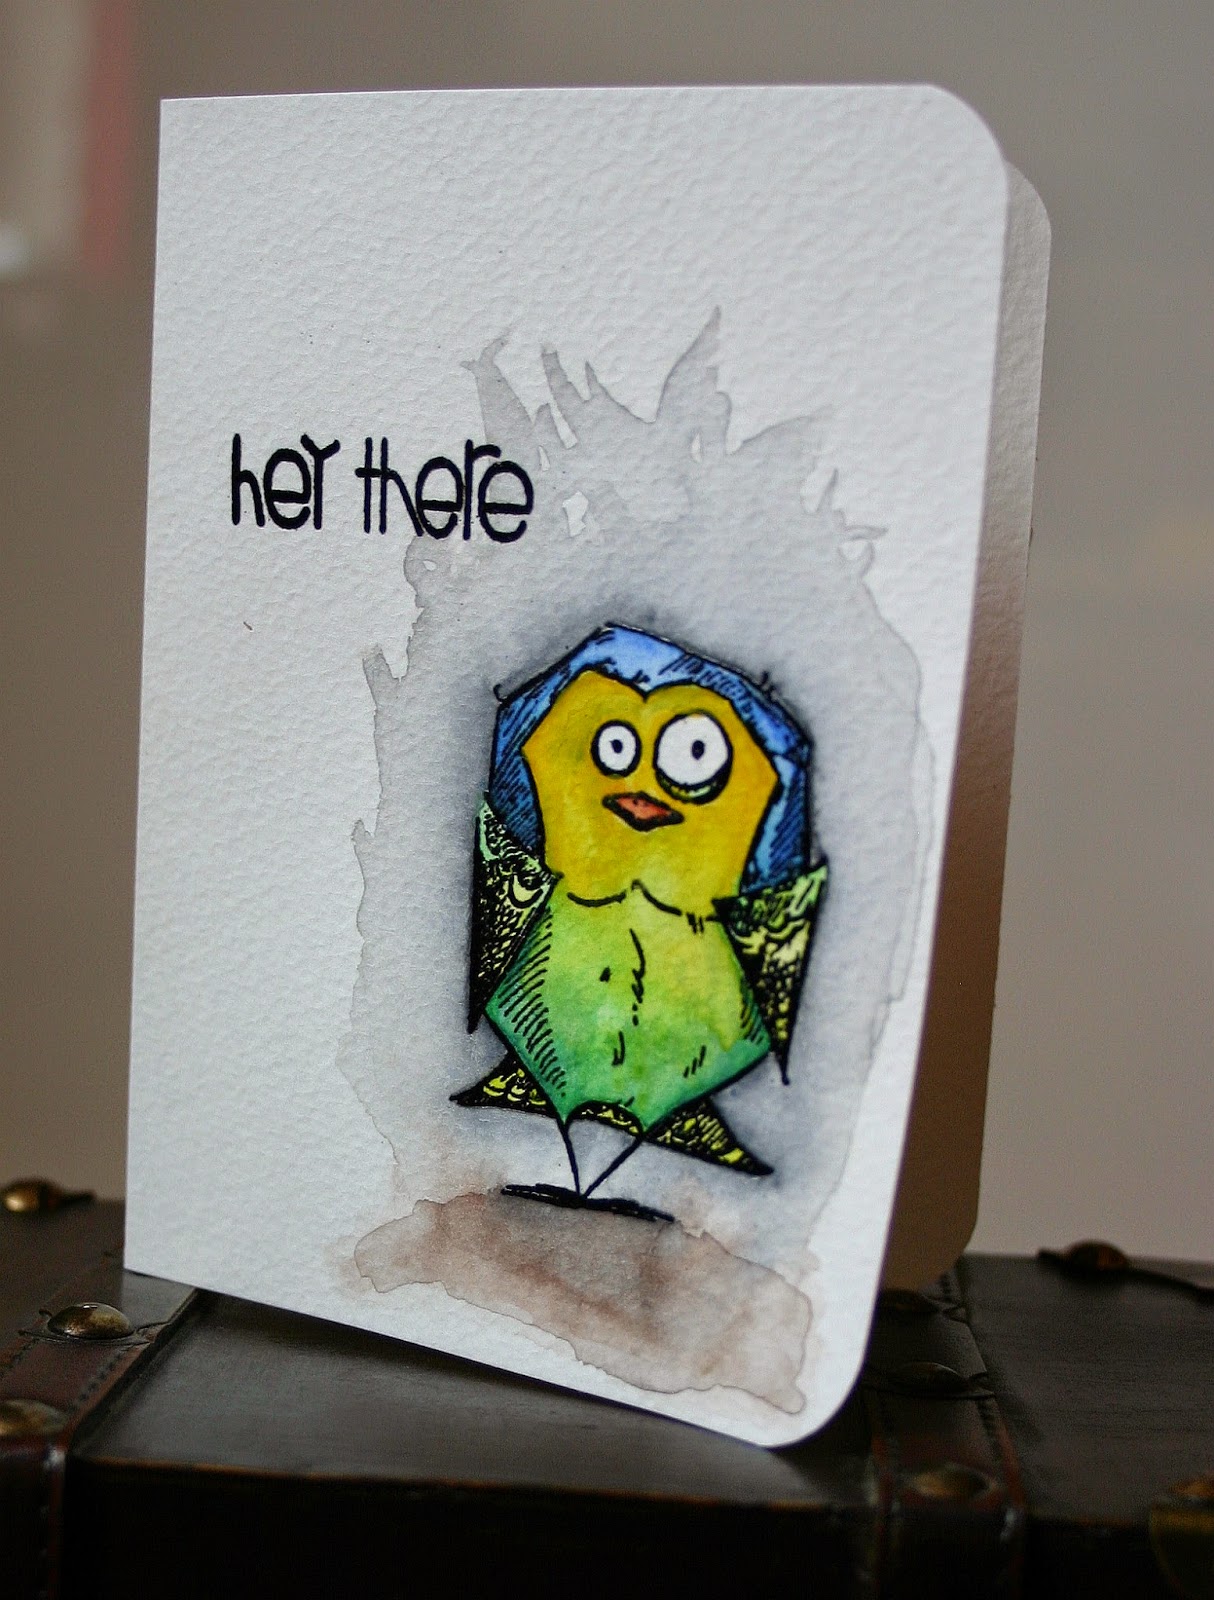
I used my alcohol markers to colour the little monster - my favourite of Jessa's designs. Jessa, can I have more monsters, pretty please? 

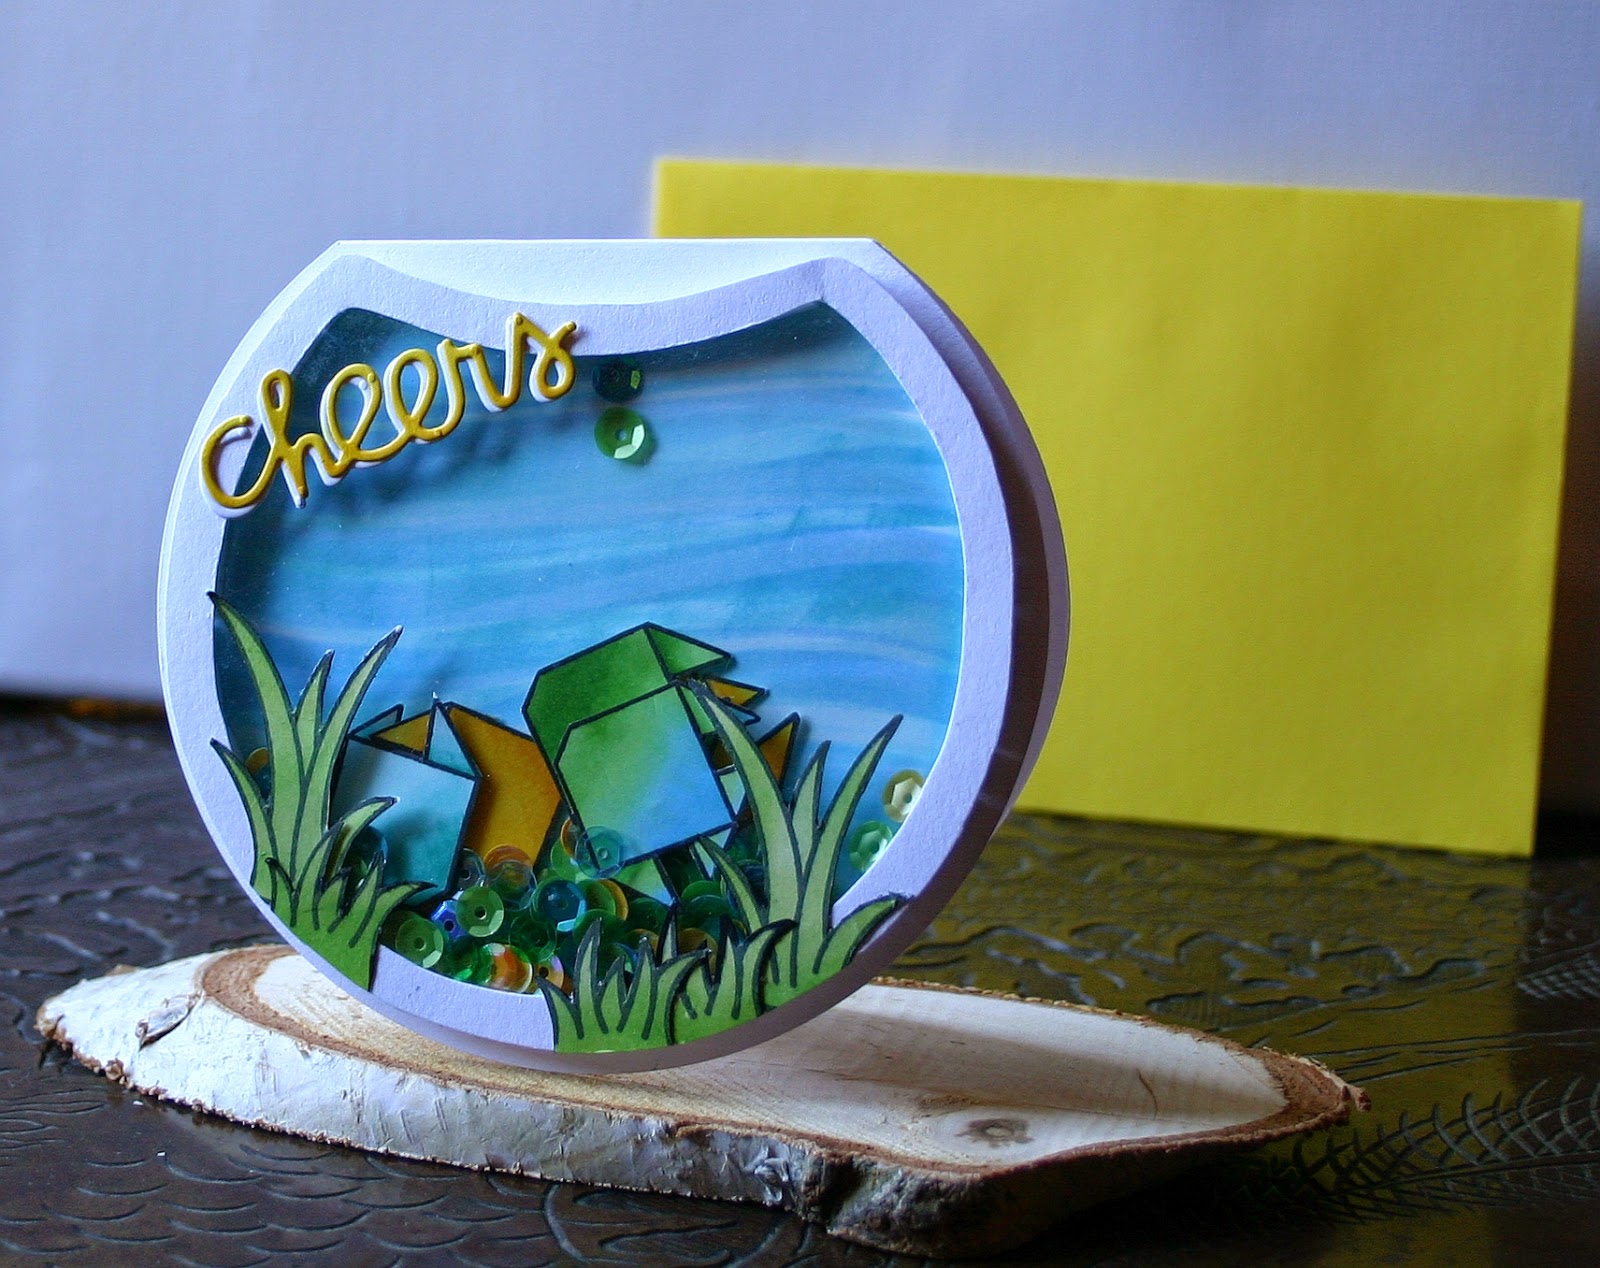
When I was done with shading, I just added little dots to give him some texture. After that I die cut the sentiment banner from white card stock and coloured it with the same green alcohol markers. No shading this time. The sentiment is from Paper Smooches. 

I adhered one side of the banner around the stick and glued it down with foam tape. For the stick itself I used matte medium. 

Then I just adhered it to a green card base and added a green envelope.

I hope, you'll take the challenge and use your digital stamps!

Looking forward to see all your cards and projects!
Ela


Challenges: 
Seize the Birthday: Anything goes Birthday
Less is more: 2 or 4 legs
Simon says stamp: Anything goes 

Wednesday 27 May 2015

Celebrate

Hello Everyone,

I needed a birthday card for a boy last Monday, and didn't have one in my stash, that I thought fitting. So I decided to re-create the card I made the other day, because these birds are so hilarious. 

I picked four birds and stamped them on my watercolour panel, masking off the ones in front. Then I coloured them with my Pelikan water colour set. I deliberately picked it over my Inktense pencils for the last few projects, because I wanted to finally get used to it. I got it before our last summer holiday for travelling, but it turned out it wasn't quite as handy as I thought. Or maybe I just don't have the mojo when I travel...

Anyhow, it worked, I've come to quite like it, especially for larger areas.


I picked nice and bright colours, as it's for a child and made sure that the colours would set the birds apart. Then I added a tiny bit of light blue to the eyes with an alcohol marker, to make them seem more dimensional.

When it had dried, I die cut the Paper Smooches word die from the image and some fun foam and puzzled all the pieces back in. After rounding the corners I adhered it to a black card base and as the very last step I added glossy accents to the eyes.


While I look at the picture now, I think I might have liked it even better with black fun foam. I think I'll try that next. 

Have a great day
Ela


Challenges:
Seize the Birthday: Anything goes Birthday
Addicted to CAS: #64 Animal


Monday 25 May 2015

Hope your day is lovely

Hi Crafters,

today I'd like to show you a card I made all from leftover pieces. 

I created the card base quite a while ago, when I was playing with embossing paste and stencils. And the succulent I created for the ribbon, buttons, twine challenge over at


I didn't use it for that challenge, but I had already coloured and fuzzy cut it. And I really like how the cup turned out, so I wanted to make sure I used it. I adhered the image to the card base with some foam and added a simple sentiment.


Probably the quickest card I ever made. I feel almost guilty about that.


Lots of love
Ela


Simon says stamp: Stencil it

Saturday 23 May 2015

No lines sympathy card

Hello Crafters,

how are you?

Today I'd like to show you another water colour card I created last week. This time I had another go ar no line colouring, but I think the stamp I chose was probably just too intricate. I found it extremely difficult.


Considering that, I am quite content with the final result, even though it's not as pretty as I had hoped. I added just a tiny bit of watered down blue around the flower, and stamped the sentiment in dark brown ink, because I thought black would be too bold.

Have a great day
Ela


Challenges:
Stempelküche: Floral

Friday 22 May 2015

May contain birds

Hello again,

I played some more with my beloved crazy birds. I have used them a lot lately, but always a single bird on a rather simple card.

This time, I wanted to do something different, so I stamped a cluster of 4 birds, masking of the ones in the front.


Then I used my water colours to colour them in and create shadows underneath the birds to ground them. 

When I was almost done, my daughter accidentally dropped a brush, loaded with colour, right onto my project where I couldn't hide it under anything, so I had to cut the panel down to a square. A well, that kind of thing just happens, I am glad I was able to cut it down...

After it had all dried, I die cut the sentiment from the finished panel and two layers of fun foam and stacked them together to create a raised sentiment. I puzzled all the pieces back in, rounded the corners and adhered it all to a square, grey card base. 

I admit, I love how they turned out, these birds are so much fun. 

Have a good day
Ela


Challenges:
Addicted to CAS: Birds

Birds and water colour

Hey Everyone, 

can you believe it, it's Friday already. This week went by so fast. 

I am now getting really panicky about my girl's Birthday next month. Despite my best intentions, I still haven't started on the preparations. Besides, as in the previous years, I really have difficulty limiting the number of guests, because there are so many "must haves".
I'll really have to make a start this week-end. 

Meanwhile I'd like to show you two more bird cards I made last week. I really love that set.


For both cards I embossed the image on a water colour card base, so they are true one layer cards. Then I coloured it with my water colours and added a fun Paper Smooches sentiment. 


I know, these cards are nothing incredibly new, but these birds are just so much fun!

Hope you all have a lovely week-end
Ela


Challenges:
Seize the Birthday: Anything goes Birthday
Paper Smooches: Anything goes

Saturday 16 May 2015

Challenge up your life: Challenge #15 Twine, buttons, ribbon

Hello Everyone, 

is it believable, time seems to fly right now. It already Challenge time again, over at


This time I personally found our Challenge exceptionally hard, because it's something I hardly ever use:

Challenge #15: Twine, buttons, ribbon

But I am content with what I achieved, so it was absolutely worth while. Here's what I did:


I started out with a selection if buttons, rather randomly chosen, and the feeling of being totally lost with them. Then I opened my box of ribbon and twine and liked nothing much, until this very broad burlap ribbon fell into my hands and I decided to use a piece of it as a panel. 

After that I spent quite  a while colouring a succulent, which didn't make it onto the card, because I just couldn't find a way to arrange it with the buttons. At this point I was pretty frustrated, and decided to go with just a sentiment. I cut out the Happy Birthday in white and black and liked neither of them on my card. But then I remembered a Challenge I had seen lately: Use the negative. 

So I cut the sentiment again, this time making sure that I arranged the words so that I could use the negative. Then I coloured the piece with a dark brown alcohol marker, to make it show up on the background. But the negative was still not very clear to read, so I decided to piece in the positive and just leave out the insides of the letters. 

I rounded the corners of the negative and the card base, arranged it all and glued it down with Matt Medium.

I am pretty happy with my card now, though now I wish I had put the sentiment on foam. But I thought of that way too late.

Hope you'll all take up the Challenge and join in!

Hugs
Ela


Friday 15 May 2015

More birds

Hi Crafters,

remember the envelope I created the other day. 

I fell in love with that bird, I really liked the look, so I decided to make a matching card - or maybe rather more, because this one will probably be just the first. I thought this could be really nice as a set to give away, with different birds and different sentiments.


Anyway, I stamped and embossed the bird and and coloured him with my water colour set this time, instead of my Inktense pencils for a change. I also picked different colours for a change, but actually I like the red yellow colour combination better.

I wanted him to think or say the sentiment, but I don't have a speech bubble stamp and I didn't want to adhere anything on, so I used a Copic Multiliner and a die cut as a template. Unfortunately this means the sentiment is not embossed, like the bird. I think I need to get a new embossing pen (or a Versamark re-inker). Mine es pretty dried out, which is why I didn't even try to use it.

So, have a good start into the week-end
Ela


Challenges:
Addicted to CAS: Birds

Thursday 14 May 2015

Happy Father's Day

Hi Crafters,

I'd like to wish you a happy Father's day today, even if most of you won't be fathers. 

My girls created a picture for their Dad this year, with my Dylusions spray mists and our only Dylusions stamp set.


I created the canvas background for them, just because it was so messy and it needed a lot of drying time, for which they don't have the patience. I also stamped out the images and helped with cutting and adhering, but the rest was all done by them. 

We also had a leftover crab that didn't make it on the canvas, so I created a card for them to write. I cut a card base from water colour card stock and painted in the sky and sand, adding small dots in darker water colour and white gel pen to give the sand some texture. Then I coloured a piece of card stock with a brown alcohol marker and created the wooded look with white pigment ink and brown shadow ink, direct to paper. Then I added some lines for the planks and some white accents with a gel pen and embossed the sentiment for the crab to hold up.
 

I love how it turned out.

Have a great day
Ela

Wednesday 13 May 2015

For the birds

Hello Everyone,

today my girls are off school, while I have to work, which is always terribly annoying for all of us. But at least the weather is nice, so they can play outside.

Last night I created a little last minute mini project for my sister-in-law, who needed small pieces of card stock, half the size of a (German) card front.


I wanted to give her a little box to go with them, so I created this little envelope box from water colour paper and heat embossed the bird in the corner. Then I coloured it in with my Inktense pencils and a lot of water and created just a bit of sky and ground.

As a finishing touch I added glossy accents to the eyes to make them shiny.


Hope you all have a nice day.
Hugs
Ela


Challenges: 
Addicted to CAS: Birds

Sunday 10 May 2015

Happy Mother's day (and a slight Teddy bear fixation)

Hello  Mothers and fellow Crafters,

I am wishing you all a very happy Mothers Day today. Let yourselves be spoiled by your hubbies and kids!

This is the card I created for my own Mum. You may wonder, why I chose this, because nothing on it screams Mother's Day. Except, for me it does and I'll tell you why.


Both of my daughters have had a cuddly teddy bear with a musical clock inside, ever since they were born. Over the years, we had to replace them several times, but always with identical teddies. The older of my girls loves her teddy so much, that until today (they'll be 9 in summer) she's dragging it around all over the house. The younger has shifted to a bunny (with far less obsession), with the result that my big girl now has two favourite teddies (which both disappear all the time), both rather dirty and worn by now, because she won't let me replace them anymore. I still have an unused replacement, but that wouldn't be the original. She loves every hole in them.

Please don't tell me it needs a wash, it just doesn't get any cleaner anymore.

The girl in  the stamp reminds me so much of her, even though my girls have straight hair, that I simply had to buy the stamp set ("Slumber Party" from Simon says Stamp).

So, to me this is like sending my Mum a picture of my girls. 

I didn't pick a Mother's Day sentiment, because I didn't have a small one I liked, so I chose something neutral. For the envelope I stamped the same grid and coloured in the watercolours, same as for the card, only I didn't add the girl.

Have a great Mother's Day and for all of you that have no kids, have a great day anyway.
Love
Ela

Thursday 7 May 2015

Another underwater card

Hello Everyone,

after so two posts without a new card, it's  about high time I show you another card today, isn't it?

So I'll show you the last one of my deep sea trio.


I know, that's nothing new, just the same idea a tiny little different, but after I re-organised my craft space, everything looked so nice and tidy, so I decided I really wanted to have my couch and carpets cleaned as well. I borrowed a carpet cleaner from the local hardware store yesterday and brought all three carpets into the living room to clean them. I wanted the mess in only one room and the couch and the craft room carpet can't be moved easily...

I am amazed at how much nicer they all look now, but you shouldn't step on them while they are still wet, so the drying time meant that I couldn't create a new card.

But on the upside, right now I am feeling like the terribly good housewife I ain't.

Hugs
Ela


Wednesday 6 May 2015

Craft room tour

Hi Everyone,

I promised you pictures of my craft space, once I was done with it, so that's what I'll show you today, even tough it isn't entirely perfect yet - will it ever be? I doubt it.

I can tell you, found it pretty hard to show everything properly, without a video, but I did my best... So, let's start with an overview over the room for your orientation.  This picture is taken from the corner with my office desk, which I will not include in the tour.


And this is from the other side. The door is to the right of the red chinese wedding chest (which hides the TV). The door you can see in the back is closed, because we didn't need it and we wanted the wall space.


In both overview pictures you can see the new Ikea shelf. I used all the five baskets for the kids crafty things. In the bottom shelves there are my business folders and boxes of things I don't often need, like Christmas and Easter decoration etc. The top shelves I tried to decorate a bit, but those dark boxes e.g. contain cards.

Now, that you have an overview, let's talk craft desk. As there is so much on it, I decided to label it for you:


1) Becca's space

2) Nicky's space

3) my space

4) Box with all kinds of pens and scissors for the girls

5) tools I frequently use, like water spray bottle, sequins, baby wipes, sponges, masking tape

6) envelopes, ink pads, markers, Gelatos, etc.

7) more things I like to have handy, like embossing powders, spare adhesives, pre-made card bases

8) ribbons, mini ink pads, stamp press, more wipes and miscellaneous stuff

9) heat tool


This is the little Ikea trolley that I keep by my side of the desk. It totally doesn't match the rest of the furniture, but it's handy. In here I store my 12x12" papers, patterned on top, card stock below. In  the drawers there are wood mount stamps and embellishments. On top is my tool box, with brushes, scissors, adhesives, masking fluid, all pens that needn't be stored flat etc. 

In this picture you can also just see, that there is a board underneath my side of the desk (you can see it much better in the first overview picture). In there, I store my envelope punch board, watercolour pencils and the score board. My watercolour papers also found a space there, though I don't really know why and the big foam tape roll, because it simply doesn't fit anywhere else.
 
 This is the other side, i.e. in my back. On the side board there's my paper storage, sorted by colour, with the scrap box on top. Also my paper trimmer and my big shot. Inside  there are all my acrylic paints and tools for that, as well as all kinds of colouring media I don't often use like water colours, crayons, chalks. Also hairspray and spray adhesive.

In the ladder shelf (it is a true ladder) there is my printer, my stencils (in the basket) and in the red containers are stamps and dies and 6x6 paper pads. The yellow box contains all Punches, the white one more Christmas stuff. This is the part I haven't completely sorted yet.

 Just because I like it so much, I'll finish my tour with a close up of my desk shelf:


Well, that's it for now, I wish you all a nice day.


Hugs
Ela

Tuesday 5 May 2015

A winner

Hi Friends,

today is such a good day, for several reasons. I am pretty much done with my craft space, my living room is nice and tidy for a change and a friend of mine took care of the broken on/off switch on my PC, so I was finally able to dump the old PC I had kept for spare parts.

But best of all, my card won the CAS(E) the DT Challenge over at Create a Smile. This makes me so happy, especially because I myself also really like how it turned out!

So here's the winner again:


I do hope you all have an equally nice day
Ela

Monday 4 May 2015

A Crafty Blog Hop

Hello Crafters,

today I am participating in the Crafty Blog hop. I was nominated by wonderfully talented Sonja of The Art of Stamping. She creates lovely cards and especially her colouring always awes me. Please don't forget to check out her blog!

Now, to the questions:


What are you working on?

Craft wise I always have something to prepare for my design team work for Challenge up your Life. Right now I have the next Challenge to prepare, but after that I have the next  two challenges prepared, so I am pretty relaxed about that.
I am also still busy using all the new supplies that arrived during the Easter holidays from Simon says Stamp.  I love what I chose and also that I still haven't used it all yet. It'll  be a long time until I can order from Simon's again, so I'll drag out the joy as long as I can.


Soon I'll have to  get started on my girls' Birthday party in June. I know, there's still time, but I like to start early. There's always something that gets in the way...


What I am mostly focusing on right now is the re-organisation my craft space - again. I don't have a dedicated craft room, but our living room is huge. Therefore my girls and I use half of it as craft room and office - the office bit being squashed in a corner. That way we have plenty of space for crafting, but with a definite lack of wall space. And desk space.

As our crafty area is always a bit messy, I wanted to separate the two areas of my living room a bit more, and bought us a new big Ikea shelf (Kallax). By now I have set it up (all alone, I am proud of that) and am busy re-organising everything to fit the new arrangement. Which resulted in several days of total mess, because I was pulling apart just about everything, trying to figure out what should go were.

I also got a small shelf (Ikea Moppe) for my alcohol markers, which makes me pretty happy, just because it looks so nice with all the colours. I also swatched out my Distress ink pads, so they now all show the colour they are on all four sides as well as the bottom.


Here's a little view of it, and I'll try to show some more pictures when I am all done.


All that has prevented me crafting a lot during the past week, which is really such a pity. But the desk was simply too full of stuff I was trying to sort... I do hope I'll get it all done soon, so I'll be back with more cards.


How does your work differ from others in your genre?
I actually don't consider myself all that special, I don't think I have a recognisable style (yet), but like to try out new techniques and ideas.
When I first started card making, I tried out different styles, but very soon I realised, that I usually gravitate towards clean and simple cards. I do  love other styles as well, e.g. shabby chic, but I just can't do them.

Why do you create what you do?
When my girls where little, I started  scrap booking, because I wanted to use all the pictures I took, and create cool memories. But the reality of having twins got me pretty quick, as soon as they started crawl and grab everything the camera moved to higher places and the number of pictures taken was therefore dramatically reduced. So was the time I had to do anything creative, so I quit scrap booking without great success, even though it was so much fun.
Years later, I discovered card making as a hobby, that provided the same kind of fun, but without the need for archival material, nice photos in the right size and the pressure that everything needs to be good enough to be kept in my album...

I spent days watching Kristina's videos, created a few cards for certain occasions and was lost forever...

Now I do what I do, because it just makes me feel good.


How does your creative process work?
I take my inspiration from wherever I find it. That can be a challenge to use a certain technique or a card I have seen somewhere. I love the card making community for that, there are so many talented crafters out there and everyone is so encouraging and seems to be happy to share their ideas.
Then with a vague idea in mind, I look at my supplies, other challenges, whatever else inspires me and decide what I want to do / use. This way I often combine two or three challenges.
The outcome is very often very different from my original idea, but that's how it works for me. 

So, with all the questions answered, I'd like to nominate my fellow Design Team member Manu  of A Breeze of Creativity & Joy who makes amazing cards. Please don't forget to check out her blog! I am already very curious what she'll have to say.  


And just because I don't want to let you go without a card, I'll show you another one I created with my Dylusion spray mists and the Deep Sea stamp set...


Have a great week

Ela

Saturday 2 May 2015

Challenge up your life: Challenge #14 Clear element

Hello Crafters,

it's Challenge time again, over at


Today we are challenging you to:

Challenge #14 Use a clear element


I received such a sweet comment on my blog the other day, about a card I made with the Ori Kami set. And I felt I totally didn't deserve it, because I hadn't done anything really special with it, so I decided to think of something better.

I cut out a circle card with my circle cutter, only I made sure that the fold was flat, a bit like a fish bowl. Then I hand cut he frame of the shaker element, the sheet of acetate and the back of the shaker

To create the water I used a wavy stencil and sponged tones of blue and teal onto the back panel. Then I stamped, sponged and fussy cut the grass from two different Lawn Fawn sets and adhered it to the frame and acetate.


After that, I stamped a lot of fishes and coloured them with my alcohol markers. I picked the ones I liked best, cut them out and put them inside my shaker, along with a lot of sequins in the same colours. Once I had the card assembled, I realised that I had forgotten the sentiment, which I had meant to go on the wavy background. So I had to play around a bit to find an alternative. I ended up with the Cheers die cut from Paper Smooches, which I cut in yellow and white. I shaded the yellow just a time bit, it's hard to see on the photo. Then I stacked yellow on top of white and adhered it to my card.


I do hope you'll play along again this time and get creative with some clear element.


Love
Ela